Posted in Bun Appétit

Bean There, Lost That: Frijoles Charro Recipe

Advertisements

Hey there! So, funny story: I could’ve sworn I posted this recipe before. I mean, I wrote it out, formatted it all cute, and probably even slipped in a pun about beans at the end. And yet, here we are—completely unable to find it!

I lovingly “borrowed” this frijoles charros recipe from my friend’s mom ages ago. I even wrote a whole blog about it, hit “publish,” and somehow… it’s just not there! It’s not on my website, not in my drafts, and not even in my “misc blog chaos FINAL FINAL FINAL” folder. 

Honestly, this isn’t too surprising for me. I tend to write everywhere: in my notes app, in journals, on napkins, on receipts, and in random Google Docs. If it can hold text, I’ve probably blogged on it! I once jotted down half a post on a paper towel. And let me tell you, I lost Hector’s wallet in my tote bag for two whole weeks! It was just hanging out under old receipts and about 47 non-working pens. So, losing an entire recipe kind of feels like my usual chaos! 

But here’s the good news—I actually remember how to make it! So, I’m writing it down right here, right now, before it disappears into the ADHD abyss forever. Let’s get cooking!

You’ll Need:

  • 5–6 cups cooked pinto beans (with liquid) – recipe below if you’re feeling extra
  • 1 tablespoon olive oil
  • ¼ onion, diced
  • 1 diced jalapeño (optional, but fun if you like chaos)
  • 5 slices bacon, diced
  • ¼–½ lb chorizo
  • 4 hot dogs, sliced
  • 4 pieces sliced ham (optional, but delicious)
  • 3–4 sprigs fresh cilantro
  • Salt and pepper to taste

Instructions:

  1. Heat a tablespoon of oil in a large pot or Dutch oven.
  2. Sauté the diced onion until soft and fragrant. If you want it spicy, toss in that jalapeño too.
  3. Add the diced bacon and cook on medium heat until it starts to crisp up.
  4. Add the chorizo, breaking it up with a spoon until fully cooked.
  5. Toss in the sliced hot dogs (and ham if using) and sauté another 2–3 minutes.
  6. If the bacon and chorizo have released too much oil, carefully spoon some out—just enough to keep things flavorful but not greasy.
  7. Add the cooked beans (with liquid!) and stir until everything’s cozy together. Simmer for about 5 minutes.
  8. Toss in the cilantro and simmer for another 2 minutes so it infuses that fresh flavor.
  9. Taste-test (the most important step), then add salt and pepper as needed.

Serve in a big bowl for dinner or as a side dish. Top with sour cream, salsa, or pickled jalapeños, and serve with warm tortillas

Posted in Bun Appétit

Pumpkin Spice Latte Syrup DIY: Bring Starbucks Flavors Home

Advertisements

Okay, okay, I get it—it’s still August, the kids are just going back to school, and summer is hanging on by a thread. But guess what? I’m already ready for fall. 🍂 And no, I’m not waiting until October to get my pumpkin spice fix. I’m an unbothered queen who’s already embracing the pumpkin vibes.

Last year, I said “peace out” to Starbucks (because, you know, self-love and saving money and we don’t support their political views), and while my local coffee shops are cool, their pumpkin spice lattes just don’t hit the same. So, here I am, making my own homemade pumpkin spice syrup. I’ve been making this for years, and I’m pretty sure I’ve shared this recipe before (like, two years ago when I was giving away the syrup with my pumpkin cookies as Christmas gifts),  I swear it was even on my fall bucket list but whatever—recycling is good for the planet, right? Plus, if you’re anything like me, you’re already planning for that first sip of pumpkin spice goodness, and trust me, this syrup will deliver.

Don’t worry; I’ll not only show you how to whip up the syrup, but I’ll also share how to use it. I’m so done with all those recipes that just show the syrup and leave you hanging. I get it—everyone has their own taste—but sometimes you really need a little more guidance.

Ingredients:

  • 1 ½ cups water
  • 1 ½ cups sugar
  • 4 (3-inch) cinnamon sticks
  • ½ teaspoon ground cloves
  • ½ teaspoon ground ginger
  • ½ teaspoon ground nutmeg
  • 2 tablespoons pumpkin puree (NOT the pie filling, we’re not making pie here)

Directions:

  1. Start with sugar and water: In a medium saucepan, combine the water and sugar. Bring it to a simmer over medium heat and stir until the sugar dissolves completely. (it should feel smooth, not gritty.)
  2. Add the pumpkin spice magic: Add in the cinnamon sticks, ground cloves, ground ginger, nutmeg, and pumpkin puree. Whisk it all together like you’re preparing for a fall holiday. Simmer for about 8 minutes, and let those spices fill the air.
  3. Cool down: Take the saucepan off the heat and let it cool to room temperature. Don’t freak out if it looks thin at first, because it will thicken as it cools.
  4. Strain and store: Strain the syrup through a fine-mesh sieve into a container. Store it in the fridge, and you’re ready to make your pumpkin spice dreams come true!

How to Make Your Pumpkin Spice Latte:

  1. Steam 6 ounces of milk until it’s nice and hot, then pour over 1 ounce of espresso (or regular coffee if you’re keeping it simple).
  2. Add 1-2 tablespoons of your homemade pumpkin spice syrup.
  3. Stir and serve!

I personally use about 2-3 tablespoons of syrup per 10-12 ounce cup of coffee, with just a splash of milk. But hey, it’s all about how you like it. Make it your own.

And that’s it! Whether it’s August or October, this homemade pumpkin spice syrup will have you feeling all the cozy fall vibes without the long Starbucks lines or the prices. I’m not here to judge if you’re already in the pumpkin mood—do you, boo.

So go ahead, enjoy your early fall indulgence, and let’s start sipping on those pumpkin spice lattes before everyone else even gets the memo.

Posted in Bun Appétit

My Mom’s Chilaquiles Rojos

Advertisements

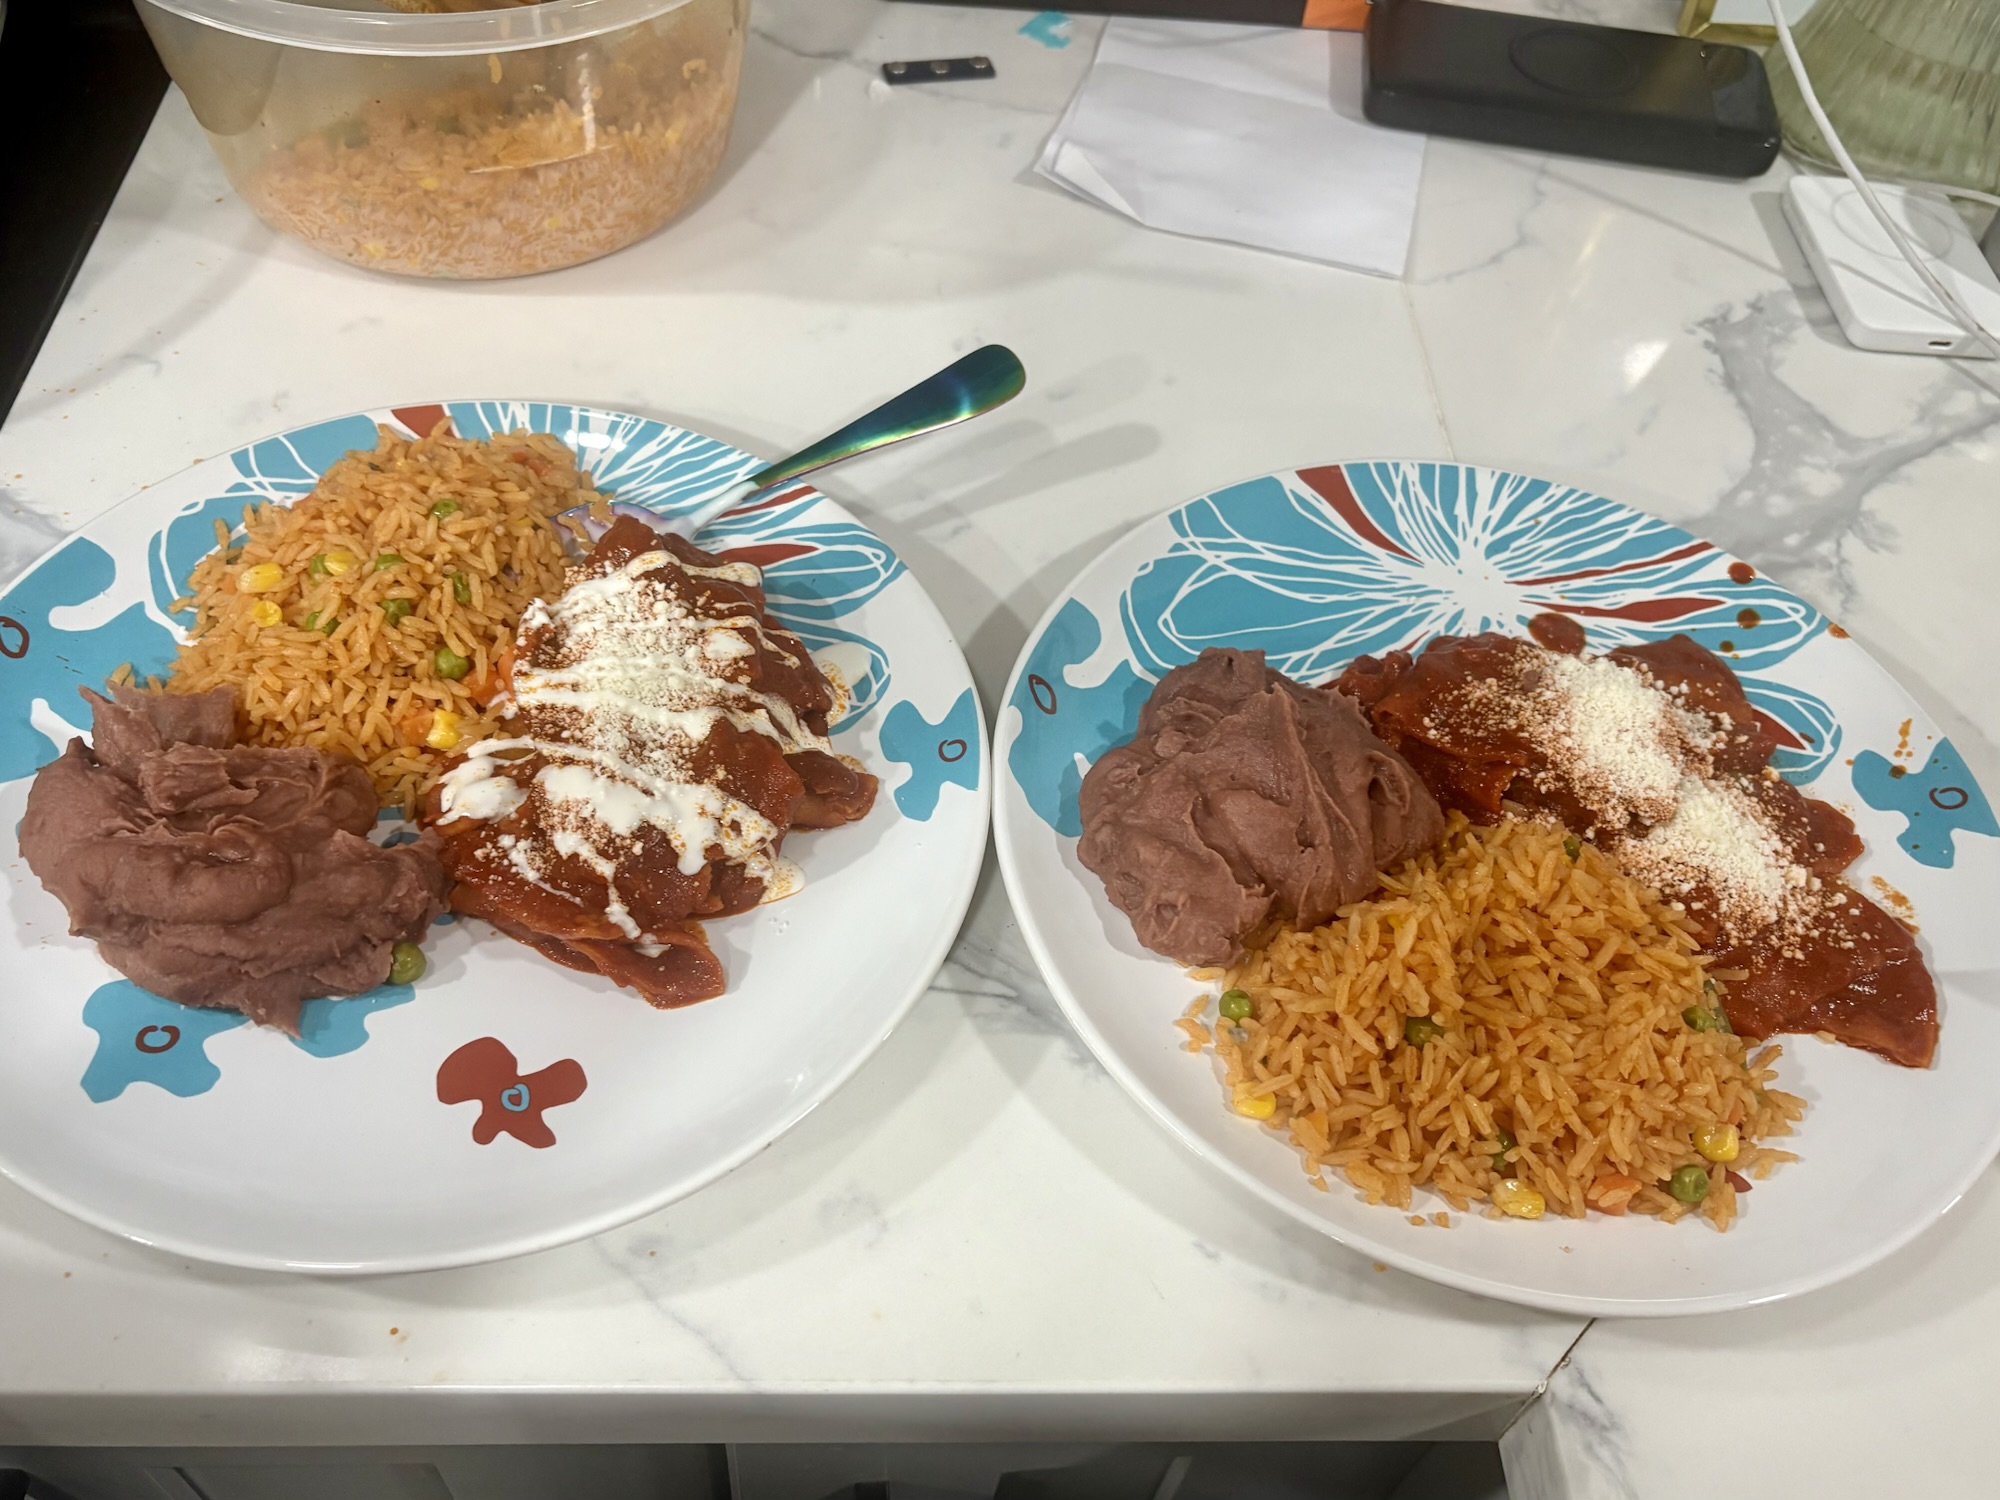
I grew up eating chilaquiles all the time—like seriously, it was a regular thing for me! There’s nothing quite like those crispy tortillas drenched in spicy salsa with all your favorite toppings; pure comfort food feels like a warm hug with every bite.

Last month, when I visited my mom in Vegas, I only asked her to whip up chilaquiles. Not that I was being lazy (okay, maybe a little), but I really wanted to snag her recipe! Now that I’ve got it, I’m super excited to share it with you. Because honestly, what’s mine is yours—especially when it’s piled high with salsa and queso.

Let’s be honest: this isn’t a groundbreaking recipe moment! If you’ve been around for a bit, you probably know that many of these recipes come straight from my mom. Please think of this as a cozy little digital recipe book filled with her best-loved dishes. I’m just here to share the deliciousness and the beautiful memories that come with it!

Quick heads-up: whenever I borrow one of her recipes, the measurements are more like vibes. She’s one of those magical moms who seasons things by instinct until it “feels right.” So if something in the recipe seems a little imprecise, it probably is—and that’s okay. Trust your gut, taste as you go, and embrace the chaos.

🛒 What You’ll Need:

– 12 corn tortillas

– Canola or avocado oil (enough to coat the tortillas for baking or about 2 cups for frying)

For the Sauce (about 2 cups):

– 3 roma tomatoes

– ⅓ of a white or yellow onion

– 2 guajillo chiles (stemmed and seeded)

– 2–3 chiles de arbol (use more if you love the heat)

– 2 garlic cloves

– ½ tbsp Knorr chicken or veggie bouillon

– ½ tsp kosher salt

– 1 tsp dried oregano

– ½ tsp black pepper

– ¼ tsp whole cumin

For Toppings (let’s have some fun!):

– Mexican crema

– Queso fresco

– Avocado slices

– Chopped red or white onion

– Jalapeños

– Radishes

– Fresh cilantro

– Fried eggs

How to Make It:

1. Whip Up the Sauce:

– Start by boiling some water with the onion and garlic.

– Remove the stems and seeds from the chiles while that’s going on.

– Once the water is boiling, take it off the heat, toss in the chiles, and let everything sit for about 10 minutes to soften up.

– Blend it all together with cumin, salt, bouillon, and the rest of the spices until smooth—about 2 minutes.

– If you want, strain the sauce through a fine mesh sieve to get rid of any bits you don’t want. Leave a little texture if you’re into that!

2. Crisp Up the Tortillas:

– Cut your tortillas into triangles or whatever shape you like!

– In a large skillet over medium heat, warm enough oil to coat the bottom.

– Fry the tortilla pieces in batches until they turn golden and crispy—don’t overcrowd the pan!

– Once done, place them on a paper towel-lined plate to drain and sprinkle some salt on them while they’re hot.

– Keep the pan on medium heat, pour in the sauce, and let it simmer for about 2 minutes.

– Add the tortilla chips back in and gently stir until they’re coated.

– As soon as they soften up (but don’t get mushy), take the pan off the heat.

Serve It Up with Toppings:

Scoop those chilaquiles into a bowl or plate and load ’em up with your fave toppings! I love adding crema, crumbled queso fresco, avocado, and a fried egg on top—because why not go all out?

Oh—and the sauce? You can totally make it ahead of time if you’re trying to save time (or avoid a hangry meltdown). Honestly, when my mom’s feeling lazy, she sometimes just uses her enchilada sauce instead—which, by the way, is an absolute staple in her kitchen. So consider this recipe more of a snapshot than a rulebook. I’ve seen her make chilaquiles like this, but I’ve also seen her do it five other ways depending on the mood, the pantry, or the cheese situation.

This recipe is quick, nostalgic, and spicy—perfect for breakfast, brunch, or a late-night snack when you’re too tired to think but can’t ignore that hunger. My mom made it with tons of love, and now I’m passing that love on to you—messy measurements and all. 

Posted in Bun Appétit

Zucchini Bread That’s Tasty… But Missing the Nostalgia

Advertisements

Do you ever have a recipe that everyone raves about, but you just can’t get into it? I recently received a zucchini that was as big as my arm, and my first thought was zucchini bread! I grew up enjoying zucchini bread all the time, but most of my friends had never even tried it—can you believe that?

I decided to whip up a batch, and the reactions were great! Everyone loved it, but it just didn’t taste like the zucchini bread I was used to. I have such fond memories of the one from a farmer’s market in Long Beach, right in front of Cabrillo. I think they stopped selling it ages ago. My aunts would occasionally make it, and my mom tried her hand at it a couple of times, but it wasn’t really her thing, so we often bought it instead. 

The bread I grew up with had this perfect, rich golden-brown crust, similar to banana bread. We would get three different kinds: regular, chocolate zucchini, and chocolate chip zucchini—yum! But I always ended up with the regular since that was what I had to work with. I used the generic recipe my mom mentioned, but it just didn’t capture the magic of the one I remembered. I totally understand why she didn’t make it more often if the recipe I used was what she had tried. It wasn’t bad, not at all, just not quite what I was hoping for. 

I will share the recipe my mom gave me, but now I’m going to experiment. I’m going to try to recreate the dish I knew as a kid. Is it possible to recreate a recipe just by taste? I’m not sure, but we will find out!

Ingredients

  • 3 cups grated fresh zucchini, about 4 zucchini
  • 1 ½ cup granulated sugar
  • 2 large eggs
  • 2 teaspoons vanilla extract
  • 1/4 teaspoon kosher salt
  • 3/4 cup butter melted (1 ½ sticks)
  • 3 cups all-purpose flour properly measured
  • 2 teaspoons baking soda
  • 2 teaspoons ground cinnamon

Instructions

  1. Preheat the oven to 350°F. Grease two 8×4-inch loaf pans. I like to use nonstick spray with flour. Set aside.
  2. Place the grated zucchini in a colander in the sink while you continue.
  3. 3 cups grated fresh zucchini
  4. Mix sugar, eggs, vanilla, salt, and butter in a large bowl.
  5. 1 ½ cup granulated sugar,2 large eggs,2 teaspoons vanilla extract,1/4 teaspoon kosher salt,3/4 cup butter
    1. The butter should be just melted but not hot. 
  6. Add flour, baking soda, and cinnamon, and whisk in until just combined.
  7. 3 cups all-purpose flour,2 teaspoons baking soda,2 teaspoons ground cinnamon
  8. Stir in grated zucchini until just incorporated.
  9. Divide batter between prepared loaf pans.
  10. Bake for 40-60 minutes, or until a wooden toothpick inserted into the center comes out clean.4
  11. Cool in pans for 10 minutes.
  12. Run a thin knife around the edges, and remove the zucchini bread onto wire cooling racks to finish cooling.
Posted in Bun Appétit

Happy National Moon Day, babes! 🌝✨

Advertisements

Today, we celebrate the amazing moment we landed on the moon back in 1969. You’d think I’d whip up something fancy and celestial, but nope—I made Moon Pies! Because the second I saw “Moon Day” on my calendar, my brain said “Moon Pies. Immediately.”

I haven’t had one in forever, but the last time I did, it was banana-flavored and honestly? Life-changing. Today, though, we’re keeping it classic. Soft marshmallow, graham-y cookie, smooth chocolate coating — literal handheld nostalgia.

This recipe started off in Garden and Gun Feb/Mar 2014, but obviously I had to add some of my own chaos and comfort into the mix. Because this isn’t just a treat — it’s a story.

But here’s the wild part — Moon Pies weren’t just made for vibes. According to the actual MoonPie site (so you know it’s real), it all started in 1917 when a Kentucky coal miner asked a traveling salesman for a snack “as big as the moon.” Iconic. The bakery delivered with a fluffy marshmallow sandwich that fit in a lunch pail, filled up tired workers, and got dubbed — you guessed it — MoonPie.

So whether you’re celebrating the wonders of space or just in it for the sweet fix, this is my chocolatey tribute to both kinds of moon legends. Let’s make a delicious (and slightly messy!) treat together. Happy Moon Day! 🌝💫🍫

My little tip

The recipe is simple, but it’s best done over a couple of days. Multiple steps. A little patience. But it pays off.
You end up with something that hits all the MoonPie nostalgia, minus the slightly-stale vibe you get from the packaged ones.
The graham cookie is light and tender. The marshmallow is fluffy and sweet. The chocolate? Rich and glossy. Like, this is the version Moon Pies dream of becoming.

Cookie Dough

I used a 2¼″ cutter instead of the original 3″ — cuter and more manageable. That gave me 19 sandwich cookies total. Plus, they just look more snack-sized. You’ll thank me later.

  • 6 oz (1½ sticks) unsalted butter

  • ¼ cup light brown sugar, firmly packed

  • ¼ cup cane syrup (I used Alaga)

  • ¼ tsp vanilla extract

  • 1½ cups all-purpose flour

  • 1¼ cups graham cracker crumbs (about one sleeve)

  • ¾ tsp kosher salt

  • ½ tsp baking powder

  • ½ tsp baking soda

  • ¼ tsp ground cinnamon

  • 2 tbsp whole milk

Cream butter, brown sugar, syrup, and vanilla in a mixer with the paddle attachment — just a minute or so to get things fluffy. In a separate bowl, whisk together all the dry ingredients.

Add dry mixture into the butter mixture on low speed. Slowly stream in the milk like you’re in a baking competition and the camera’s watching. Mix until it becomes a real-deal dough.

Flatten it into a disk, wrap in plastic, and chill in the fridge for at least an hour. (I left mine overnight and let it soften on the counter for 30 minutes — chaos but effective.)

Preheat oven to 325°F. Roll out dough on a floured surface to ¼” thick and cut into 2- or 3-inch rounds. Line ‘em up on a parchment-lined baking sheet and give them room to breathe (about 2 inches apart).

Bake 10–12 minutes until barely golden, then let them cool completely while you pretend you’re not going to eat one early.

Marshmallow Filling

Original recipe made way too much marshmallow. I scaled it down so you’re not stuck with a bowl of leftover fluff whispering your name at midnight.

  • 2¾ tsp powdered gelatin

  • 5 tbsp + 1 tsp ice-cold water

  • ¼ cup room temperature water

  • 2 tbsp + 2 tsp light corn syrup

  • 2 tbsp honey

  • ½ cup granulated sugar

  • 2 large egg whites

Sprinkle gelatin over the ice-cold water and let it bloom while you prep the syrup.

In a small saucepan, combine room-temp water, corn syrup, honey, and sugar. Heat until it hits 240°F (use a candy thermometer if you want to impress yourself).

When syrup hits 200°F, start whipping your egg whites.

Once syrup hits 240°F, remove from heat and stir in the bloomed gelatin.

Slowly drizzle the hot syrup into the whipping egg whites (try not to splash or burn yourself). Whip 8–10 minutes until thick, glossy, and stiff like your best hair day.

Match your cookies in pairs. Flip half over and dollop about ¼ cup of marshmallow on each. Top with the other cookie and press gently until the filling just reaches the edge.

Chill for at least 15 minutes while you melt the chocolate. Use this time wisely — maybe sneak a marshmallow lick.

Chocolate Coating

  • 1 lb bittersweet chocolate (61–70% cacao)

  • 2 tbsp vegetable or canola oil

Melt chocolate in the microwave in 30-second bursts, stirring after each. When mostly melted, stir until smooth. Let cool slightly, then whisk in the oil for that perfect silky shell.

Line a baking sheet with parchment or foil, place a cooling rack on top.

Dip each cookie sandwich in chocolate with a fork, let the excess drip off, and place on the rack.

Let chocolate harden for a few hours or pop them in the fridge to speed things up.

Store in an airtight container — or just eat them all and don’t tell anyone.

Happy Moon Day!
Let’s make magic (and a little mess). 🌚🍫💥

Posted in Bun Appétit

It’s as easy as apple pie

Advertisements

Happy Pi Day, everyone! It’s March 14th, and I have a delightful little story to share! I recently moved, and to show my gratitude to my amazing friends who lent a helping hand, I decided to whip up some scrumptious apple pies. Well, kind of! My oven’s pilot light decided to go on strike, so instead of baking them myself, I prepped everything and sent the pies home with my friends to finish the baking. They were such great sports about it!

I made a classic Dutch apple pie, and let me tell you, I really know how to make a pie crust! But do I do it often? Not! I mean, premade pie crust exists for a reason, and honestly, no one can tell the difference! So, pick your favorite premade pie crust or recipe, and let’s get started!

For the pecan-streusel topping: 

  1. 6  tablespoons cold, salted butter, cut into cubes or slices
  2. 1/2  cup sugar
  3. 1/2  cup all-purpose flour
  4. 1/2  cup old-fashioned, uncooked oats, not quick-cooking or instant
  5. 1  teaspoon ground cinnamon 
  6. 1  cup coarsely chopped pecans or walnuts (optional; you can use no nuts)

For the pie filling:

  1. 1 1/2  pounds peeled, cored, and thinly sliced Granny Smith Apples (Note:  I got 1 1/2 pounds from 4 large, 9-ounce apples.  If your apples are smaller, you may need 6-7 apples.)
  2. 1/2  cup sugar
  3. 6  tablespoons all-purpose flour
  4. 1  cup sour cream
  5. 1  teaspoon lemon juice
  6. 1/2  teaspoon pure apple extract*
  7. 1/2  teaspoon pure vanilla extract
  8. 1  teaspoon ground cinnamon
  9. 1/4  teaspoon ground cloves
  10. 1/8  teaspoon ground nutmeg
  11. 1/4  teaspoon sea salt

Prepare the walnut-streusel topping: 

  1. Using a pastry blender and a sharp knife in a medium mixing bowl, “cut” the butter into the sugar, flour, and cinnamon until the mixture resembles pea-sized crumbs.
  2. Fold in the nuts, which are the same size as the butter pieces.


Prepare the pie filling:

  1.  In a large mixing bowl, stir together the sugar, flour, cinnamon, cloves, nutmeg, and salt using a large rubber spatula. 
  2. Add the sour cream, lemon juice, and extracts.  
  3. Thoroughly stir.  The mixture should be smooth and uniform in color.  Set aside.
  4.  Peel,  slice, and add the apples in increments as you work, stirring into the sour cream mixture each time.
  5. This will ensure the apples get thoroughly and evenly coated in the sour cream mixture.

Prepare the pie:

  1. Spoon the pie filling into the pie shell. Take your time; don’t dump it in.
  2. Spoon the streusel topping evenly over the pie filling, taking the time to spread it into the edges and mound it towards the center.  Do not pack it or anything down.  Keep it light and airy.
  3. Bake on the center rack of a 350-degree oven for 1 hour. 
  4.  After the first 30 minutes in the oven, lay a sheet of aluminum foil over the top of the pie.  Make no attempt to seal it.  The foil sheet is there for protection, to keep the walnuts from burning. 

You’re typically meant to let the pie cool for about 4 to 6 hours before serving, but honestly, we don’t usually stick to that! I like to whip up the pie before dinner when I’m hosting and then serve it afterward. So, it usually gets around 2 hours to cool in my home. It still tastes great, though!

Here’s a fun little secret that I just have to share with you! During my time at a bakery, we had this amazing trick up our sleeves: we’d add a splash of Amaretto Liqueur to the pie filling! This little twist gives the filling an incredible flavor boost that takes it to the next level. Don’t worry; it’s not enough to make anyone tipsy—just pure deliciousness in every bite!

Posted in Bun Appétit, Monthly Muses

Yule Log

Advertisements

INGREDIENTS 

CAKE 

– 6 eggs 

– 13.25 oz. box chocolate cake mix 

– ⅓ cup water 

– ¼ cup vegetable oil or canola oil 

FILLING 

– 12 oz can frosting or make your own 

FROSTING 

– Chocolate ganache

EXTRAS 

– Powdered sugar 

– kitchen towel

– 12×18 baking sheet 

Instructions for Making a Chocolate Log Cake

1. Preheat the Oven: Preheat your oven to 350°F (175°C).

2. Beat the Eggs: In a large bowl, use an electric mixer to beat the eggs for 5 minutes until they are frothy and a pale yellow color.

3. Create the Batter: Add the cake mix, water, and oil to the beaten eggs. Beat the mixture at low speed for 2 minutes until well combined.

4. Prepare the Baking Sheet: Line a 12×18-inch baking pan with parchment paper or a silicone liner. Coat the liner with baking spray, and be sure to grease the sides of the pan as well.

5. Add Batter to Baking Sheet: Pour the batter into the prepared baking sheet and spread it evenly.

6. Bake: Bake in the preheated oven for 12-15 minutes or until a toothpick inserted into the center comes out clean.

7. Let Cool: Once the toothpick comes out clean, remove the cake from the oven and let it cool for at least 5 minutes, but no longer than 10 minutes.

8. Release the Cake from the Pan: While the cake is still warm, grab a clean linen dish towel. Sprinkle powdered sugar on both sides of the towel to prevent sticking, then lay it over the top of the cake. Holding the towel and the pan together, gently flip the pan upside down so the cake drops onto the towel. Tap the pan if needed to release the cake.

9. Roll the Cake: Carefully peel the parchment paper or silicone liner from the cake. Then, tightly but gently roll the cake up using the towel to help separate the layers. Place the rolled cake, seam-side down, on a cooling rack and let it cool for at least 15 minutes.

10. Unroll and Add Filling: Once cooled, gently unroll the cake and spread a layer of frosting to the edges. Then, gently but tightly roll the cake back up to form a log. Place the log onto a serving dish, seam-side down.

12. Frost the Cake: Frost the entire outside of the log with chocolate ganache

13. Add Bark Texture: Use a fork to create a bark-like pattern in the frosting for texture.

14. Garnish: Decorate your log cake with fresh cranberries and rosemary, or use your creativity to create a wintery scene with any decorative items you like. Adding mushrooms or woodland creatures can make it even more fun!

Enjoy your beautiful chocolate log cake!

Posted in Bun Appétit, Monthly Muses

Making Tamales

Advertisements

I’m so excited to share that I finally decided to make tamales by myself for the first time in two years! I’ve been helping my friend’s family, but I’ve usually just taken part in the assembly. They already prepare the meat, sauce, and masa, and I just add the meat to the masa, throw in some green olives, potatoes, and jalapeños, and then fold them up. If you’ve never tried tamales made this way, you’re really missing out! My friend’s mom is from an area in Mexico near Ensenada, and that’s how she learned to make them.

This time, though, I really wanted to recreate the way my mom makes them. I wanted to prepare the meat, sauce, and masa all on my own. I didn’t end up making my masa from scratch, but I came pretty close! I used some prepared masa from Superior, added lard, salt, and juice from the meat, and mixed it until it reached a nice peanut butter-like consistency.

Oh, and I finally got my mom to write down her recipe! You wouldn’t believe how challenging that was—she’s one of those cooks who just adds spices until it “feels right.” It’s a little tricky getting her to stick to measurements!

Posted in Bun Appétit, Monthly Muses

Watergate Cake

Advertisements

Happy Blogmas Day 9!

I’m excited that my classes are wrapping up, which means it’s time for potlucks! Each class hosts a potluck on the last days of class; at least my professors do.

I’m making churro cupcakes for my intercultural class because they would be a fun way to share my Americanized twist on Hispanic culture.

One of my professors is a self-proclaimed lover of sweets, particularly chocolate, so I will make my brownie bites again for my English class. 

In my history class, we’re wrapping up with a focus on Nixon and the 1970s, and I’ve decided to make Watergate cake — I mean, what a fitting name, right? I might also whip up a version without pecans, just in case! You might be thinking, “I’ve never had Watergate cake; I only know Watergate salad!” or you might be saying, “What on earth are either of those?” I really enjoy Watergate salad too; it’s a lot like ambrosia salad, which is basically just whipped cream mixed with a bunch of fruit! As for Watergate cake, it’s a delightful vanilla cake made with pistachio pudding, coconut, and pecans.

The best part is that all these recipes use a box mix; with just a little tweaking, they won’t taste artificial! It’s a fun and easy way to make delicious treats!

For a tired and true Watergate Cake recipe

For the cake:

  • 1 (16.25-ounce) box white cake mix
  • 1 (3.4-ounce) box instant pistachio pudding mix
  • 3 large eggs
  • 1 cup Vegetable oil
  • 1 cup club soda
  • 1/2 cup finely chopped pecans
  • Preheat oven to 350 degrees. Grease and flour a 10-inch Bundt pan.
  • Using an electric mixer, beat cake mix, 1 box of pistachio pudding, eggs, vegetable oil, and club soda for 2 minutes. Stir in pecans.
  • Pour batter into prepared pan and bake for 50 to 55 minutes.

For the frosting:

  • 1½ cups cold milk
  • 1 package (3.4 oz) instant pistachio pudding mix
  • 1 carton (8 oz) whipped topping,thawed
  • ¼ cup chopped pistachios and pecans
  • Maraschino cherries
  •  place the milk and the remaining package of pudding mix in a large bowl. Whisk until smooth. Let sit for 5 minutes (the pudding will firm up a bit). Then, fold in the whipped topping.
  • Spread the frosting on top of the cake. Sprinkle with chopped nuts and Maraschino cherries. Refrigerate for at least 30 minutes before serving to allow the frosting to firm up slightly.

I really love the recipe I’ve always used since it’s what I grew up with, but I’m excited to give this coconut version a try tonight! It seems like a fun twist on the classic! Watergate Cake Recipe

Posted in Bun Appétit

Game Day Hand Pies!

Advertisements

Let’s go!

Wow, can you believe it? The 49ers have made it to the Super Bowl! I was so sure that the Lions and the Ravens were going to face off in 2024’s biggest game, but the 49ers have defied all odds and made it to the top. 

Unfortunately, I have to work today, but that won’t stop me from bringing the hype to my job! I’m ready to support the 49ers and make this a Super Bowl celebration to remember!

I still get to enjoy the best part of the Super Bowl: food. My coworkers and I have planned pizza, wings, and dessert. Initially, I would make a delicious gooseberry and raspberry crumble pie, but I wanted something even better – something everyone could grab and enjoy! That’s why I’m making empanadas – they’re the perfect addition to our Super Bowl feast! And they look like footballs! Win-Win in my book. 

Today’s game has a red theme. I read online that it’s between “Red” and “Red (Taylor’s Version)”, which I agree with. However, I also heard that the Kansas City Chiefs are wearing red uniforms, which means that the San Francisco 49ers have to wear their white uniforms. So, it’s not going to be a red versus red game. But one can dream. 

Ingredients

  • Premade pie crust – I use Pillsbury
  • ½ cup fresh strawberries diced or strawberry jam
  • ¾ cup chocolate chips.
  • Egg wash- 1 egg
  • sugar and cinnamon in a bowl

Instructions

  • Preheat oven to 375 degrees. Line the baking sheet with parchment paper and set aside.
  • Roll out pie crust on a lightly floured surface.
  • Using a 2-inch circle cookie cutter, cut ten circles.
  • Brush egg wash around the edge of each circle
  • Place one teaspoon of strawberries on each circle.
  • Top with mini chocolate chips.
  • Fold over half the pastry and press down the edges with a fork, or use an empanada press like I did. 
  • Brush the egg, wash over the crust, and roll in cinnamon sugar.  
  • Place on the baking sheet and bake for 10- 20 minutes.