Posted in Bun Appétit

Starting My Sourdough Starter

Advertisements

This spring, I’m coming back to something familiar: sourdough. I’ve done this before—back in 2020, when so many of us were trying new things at home. I kept a starter going for years, tucked in a big jar in the fridge, feeding it regularly and using it for everything from biscuits and scones to muffins and pancakes. It became part of my routine for a while… until, sometime around 2022, I slowly lost interest and let it go.

So this isn’t exactly new—it’s more like starting again.

There’s something about spring that makes it feel right. A season for growing things, or regrowing them. Not just plants, but habits, hobbies, and little rituals that once brought joy. Sourdough feels like the perfect fit for that kind of reset.

I’m using the same simple method I followed before. To begin, dissolve 1 teaspoon of sugar in ½ cup warm water, sprinkle in one packet of yeast, and let it sit for about 10 minutes. Then add 1½ cups warm water and 2 cups of flour, mixing until smooth. Cover it and leave it out overnight. On day two, stir in 1 cup flour, ½ cup sugar, and 1 cup milk, then cover and refrigerate. For the next couple of days, just stir daily. On day five, feed it again the same way as day two, then continue stirring each day through day nine. By day ten, it’s ready to use—bake something, share a cup with a friend, and keep a portion going by feeding it again.

Even having done this before, there’s still that sense of uncertainty. Will it bubble the way I remember? Will I keep up with it this time? But I’m trying not to focus on getting it “right.” Like before, it’s really about consistency and care—showing up each day, paying attention, and letting it grow slowly.

If nothing else, it’s a small, steady reminder: some things are worth starting again.

Posted in Bun Appétit

Super Bowl,Chocolate Chip Cookies

Advertisements

So… full honesty? I’m not excited about either team winning this years Super Bowl, which is exactly 1 week away!!!

I was really hoping the Rams would make it to the Super Bowl, and when that didn’t happen, my hype kind of deflated. Patriots vs. Seahawks doesn’t do much for me, so I’m officially going to be watching as a very uninvested observer. The real highlight for me is the halftime show—which, conveniently, is the only time my family actually stops talking. No one in my house is a big sports fan except me, so those uninterrupted 15 minutes feel sacred.

Because my heart isn’t fully in the game, I’m also giving myself permission to be lazy this year. No hand pies, no empanadas, no football-shaped anything. Just cookies. Easy, comforting, low effort cookies—and honestly, that feels right.

To keep it at least a little festive, I’m coloring the dough in each teams three colors and turning them into tri-color chocolate chip cookies. It’s simple, it’s fun, and it doesn’t require the emotional investment that this matchup apparently expects from me.

Ingredients
1 cup softened butter (sweet cream, salted)
1 cup granulated sugar
½ cup brown sugar
2 eggs
2 teaspoons vanilla
1 teaspoon baking soda
½ teaspoon salt
2¾ cups all-purpose flour
1 bag Nestlé Toll House chocolate chips
Wilton Color Right Food Coloring System

Instructions
Cream the butter, brown sugar, and granulated sugar in a mixer.
Add the eggs and vanilla; mix until fluffy.
Add baking soda and salt; mix well.
Add flour gradually until fully incorporated.
Divide dough into three equal portions.
Color each portion a different team color.
Mix chocolate chips into each portion.
Form a 2 oz cookie dough ball using all three colors together.
Lightly press onto a cookie sheet.
Bake at 375°F for 8–10 minutes, until edges are golden.

I may not care who wins, but I do care about dessert and an exciting halftime show—and this year, that’s more than enough to make Super Bowl Sunday worth it.

Posted in Bun Appétit

My Crazy Cravings: Enter the Chili Relleno Burger

Advertisements

I haven’t actually made this yet, but honestly? That’s never stopped my imagination before.

Hector says I get stoner cravings when I’m cramping. I want to argue with him… but today’s food thought experiment is making his case very strong.

Because tell me why my brain confidently announced that what the world needs right now is a Chili Relleno Burger.

Not a suggestion. A declaration.

Picture this:

Top bun slathered in a spicy chipotle sauce — smoky, creamy, slightly unhinged. Sitting right under it? A full chili relleno. Yes, the whole thing. Fried, cheesy, glorious. No restraint.

Then comes the burger patty, but she’s not alone. Oh no. She’s been stuffed with pico de gallo and bacon, because why keep those flavors on the outside when you can hide them inside like delicious secrets?

And finally, the bottom bun gets the calmest role of all: sliced avocado. Cool. Creamy. Trying desperately to balance the chaos above it.

Is this excessive? Absolutely.
Is it unnecessary? Probably.
Would I eat it without hesitation? With both hands.

There’s something about cramping that flips a switch in my brain from “reasonable adult” to “what if we combined everything?” And honestly, I’m choosing to see this not as a flaw, but as a creative process.

So no, I haven’t made the Chili Relleno Burger yet. But the craving has spoken. And if this ends up on a plate someday, just know — it all started here, during cramps, under accusation, fueled by imagination and hunger.

Hector… you might be right. But also?
Let me cook.

I can only imagine how intense my pregnancy cravings will be if this is my normal!

Posted in Bun Appétit

Shortcut Chicken Mole 

Advertisements

Let’s get one thing straight: this mole is not homemade.

And yet… it’s so good.

This is my favorite kind of kitchen magic — the kind that starts with a jar, adds a little love, and ends with people asking, “Wait… how did you make this?”

About the Chicken

For this recipe, I used about 5 pounds of chicken, chopped it up, and cooked it separately with a little oil, onion, and garlic until fully cooked and lightly golden.

That said, this mole is flexible:

  • You can use shredded chicken
  • You can boil a whole chicken and use that broth for extra flavor
  • You can do whatever works best for you

The mole is the star — the chicken just needs to show up ready.

While your chicken is cooking, this is when the mole magic happens.

For the Mole Sauce

  • 5 oz tomatoes
  • 1 white onion, cut into thick slices
  • 1 small garlic clove
  • 4–5 cups chicken broth (more as needed)
  • 1 toasted corn tortilla
  • 1 jar (8.25 oz) DOÑA MARÍA® Mole
  • ½ tablet Mexican chocolate
  • ¼ teaspoon ground cinnamon
  • Salt, to taste

For the Chicken

  • 5 lbs chicken, chopped into pieces
  • Oil, for cooking
  • 1 small onion, chopped
  • 1–2 garlic cloves, minced
  • Salt, to taste

Instructions

While the chicken is cooking, place the tomatoes, onion slices, and garlic in a saucepan. Cover with water and bring to a boil over medium-high heat.

Once boiling, reduce the heat and simmer for about 8 minutes, or until the tomatoes are softened.

Drain the water.

Transfer the cooked tomatoes, onion, garlic, and toasted tortilla to a blender. Blend until smooth and velvety. Set aside.

Place a large frying pan or pot over low heat. Add the jar of Doña María mole and 1 cup of chicken broth, stirring slowly to loosen the paste.

Add another cup of broth, followed by the blended tomato sauce, Mexican chocolate, and ground cinnamon. Stir patiently until the mole paste fully dissolves into a rich, glossy sauce.

Mole thickens as it cooks, so add more chicken broth as needed

Some people like their mole thicker, others like it silkier. Adjust the broth to your liking.

Traditionally, mole should have the consistency of a thick, spoon-coating gravy.

Add the cooked chicken to the mole sauce, season with salt to taste, and gently simmer for about 5 minutes, allowing the flavors to fully come together.

I use this same mole recipe to make mole enchiladas.

Serve this chicken mole with rice, warm tortillas, and beans.

Posted in Bun Appétit

Chicken Tinga and the Art of Feeling Home

Advertisements

Lately I’ve been wanting something from my childhood. Not a specific memory, not even a person—just a feeling. That quiet, grounding kind of comfort that settles in your chest and makes you feel like things might be okay, at least for a moment.

So I cooked.

I made chicken tinga and chicken mole. It was my first time ever making tinga, which feels funny to say out loud because chicken mole is something I make all the time. I don’t follow a strict recipe anymore I just know when it smells right, when it tastes right. Tinga felt new, but familiar enough that I trusted myself with it.

While I was cooking, I kept thinking about this moment from years ago when I was living in Vegas. My ex and an old friend asked me to make something “traditionally Mexican,” and I remember freezing. I didn’t know how to answer that then, and I still don’t now. I don’t know where the line is between traditional and Americanized, because the food I grew up with didn’t come with labels—it was just what we ate.

I remember being at my grandmother’s house, eating frijoles with a tortilla on the side. The tortilla had mayo on it. That was normal. That was home. No one explained it, no one questioned it—it just existed, the same way families do.

I think that’s why cooking feels so grounding for me now. I’m not trying to recreate something perfectly or prove that I belong to any specific category. I’m just trying to make something that feels familiar. Something that reminds me I come from somewhere, even if my memories are layered and a little blurry around the edges.

Making a dish I’d never made before alongside one I know by heart felt right. Like standing with one foot in the past and one foot in the present. Like honoring where I’ve been while still letting myself try something new. The food didn’t need to be perfect. It just needed to be warm, filling, and real.

When I was looking up chicken tinga recipes, I discovered that even Paula Deen has one. I briefly considered making it. I did not. Instead, like always, I called my mom. She gave me a very loose, very vibes-based explanation of how she’d make it, and I did my best to turn that into something resembling a coherent recipe. Which honestly feels more true to how I learned to cook anyway.

Ingredients

Chicken

  • 3 lbs chicken thighs or leg quarters
    (bone-in, skin-on for flavor or boneless/skinless for ease)
  • salt
  • black pepper
  • vegetable oil

Sauce Base

  • 1 large onion, sliced or chopped
  • 3 cloves garlic, minced
  • 1 large (28 oz) can diced tomatoes
    (or 2 smaller 14.5 oz cans)
  • 7.5 oz can chipotle peppers in adobo
  • dried oregano (or 1 tsp fresh)
  • ground cumin (optional but nice)
  • 1 cup chicken broth

Instructions

1. Brown the Chicken

Heat oil in a large skillet or Dutch oven over medium-high heat.
Season chicken with salt and pepper. Brown well on one side (or both sides if boneless).
You’re not cooking it through—just building flavor. Remove chicken and set aside.

2. Build the Sauce

Add about 3 tbsp oil to the same pan.
Add onion and cook, scraping up browned bits, until soft and lightly golden.
Add garlic and cook 1–2 minutes until fragrant.

Stir in:

  • Tomatoes (with juices)
  • Chipotle peppers or chipotle powder
  • Oregano
  • Cumin
  • Chicken broth

Bring to a simmer and cook 15–20 minutes, letting everything soften and come together.

3. Blend (Optional but Recommended)

Remove sauce from heat. Let cool slightly, then blend until smooth
(or leave chunky if you want a more rustic texture).
Taste and adjust salt.

4. Cook Until Tender

Place chicken in a large baking dish or return it to the pot.
Pour sauce over chicken.

  • Oven method: Bake uncovered at 350°F for 45 minutes
  • Stovetop method: Simmer covered on low for 45–60 minutes

Chicken should be very tender and easy to shred.

5. Shred + Finish

Remove chicken, shred with forks, discard skin/bones if needed.
Return shredded chicken to the sauce and stir to combine.
Simmer 5–10 more minutes so everything gets cozy.

Posted in Bun Appétit

Dad’s Cozy Potato & Cheese Recipe

Advertisements

Okay, here’s the tea: My mom was the kitchen goddess. The queen of comfort food. Like, I don’t know how she made magic happen in that kitchen, but it was always chef’s kiss level.

My dad? Eh, he could cook… but he wasn’t what I’d call a “real cook,” you know? Like, he’d throw some stuff together and somehow it was ALWAYS good, but don’t ask him for a recipe, because he didn’t have one. He was all vibes. A sprinkle of this, a dash of that, and bam—instant deliciousness.

But then… once in a while, he’d step into the kitchen and make this potato-tomato-cheese situation that honestly has a permanent spot in my soul. Like, it’s not just a dish, it’s a feeling. A vibe. A moment in time.

For years—and I mean YEARS—I begged him for the recipe. Like, I literally harassed him. Dad, please, tell me how you make it! I NEED TO KNOW! He’d be like, “Oh, I just made it,” or send me these half-texts that sounded like he was talking to himself and not a person who wanted to actually make it. But FINALLY, after enough tears and pleading (okay, maybe just a few dramatic texts), he gave in. And he sent me the recipe, straight from him. Casual. Laid-back. Just like him. And you know what? That’s what makes it perfect.

Ingredients

  • Potatoes
  • Tomato sauce
  • Water
  • Seasonings to taste
  • Joseph Farms cheese (non-negotiable—Dad insisted!)

Instructions (Just the Way Dad Told Me)

  1. Fry the potatoes
    He said to fry the potatoes for about 20 minutes, just to get some color on them.
  2. Add water
    Add just enough water to cover the potatoes.
  3. Tomato sauce goes in
    Pour in the tomato sauce and stir it around.
  4. Season however you like
    Dad wasn’t big on measuring—“taste it and decide” was basically his cooking philosophy.
  5. Cook until fork-soft
    Let everything simmer until the potatoes are tender and the sauce thickens.
  6. Finish with Joseph Farms cheese
    And he was very clear about this part: it has to be Joseph Farms cheese. Let it melt into the sauce for that creamy finish.

It’s simple. It’s comforting. It’s dad-coded.
It’s the culinary equivalent of: “I don’t cook much… but when I do, it’s this.”

And honestly?
That makes it perfect.

Posted in Bun Appétit

Before the Bacon: Frijoles de la Olla

Advertisements

So, if you’ve read my Frijoles Charros post (aka the recipe I swore I already posted but didn’t), you already know the beans are the real heroes of the story. But before they get all dressed up with bacon, chorizo, and general flavor chaos, they start their journey here—in the pot. Literally.

Welcome to Frijoles de la Olla, which translates to beans from the pot, or as I like to call them, the calm before the charro storm.

These are your base beans: tender, brothy, and cozy enough to eat all on their own. You can serve them plain, top them with a little cheese, or (if you’re me) immediately turn them into frijoles charros before you lose focus and start reorganizing your spice rack.

You’ll Need:

  • 1 lb dried pinto beans, picked over and rinsed
  • 3 liters (12 ¾ cups) water
  • ½ medium white onion, cut into large chunks
  • 7 cloves garlic, whole and peeled
  • 1¾ tbsp lard (or oil, but lard hits different)
  • 2 fresh bay leaves
  • Sea salt, to taste

Instructions:

  1. Sort through your beans and remove any little rocks or mystery items. (Every bag of beans has at least one tiny geode in it, I swear.)
  2. Rinse them well.
  3. Soak overnight (or at least 6 hours). Give them time to process their emotions and absorb some water.
  4. In a large pot, combine the beans, water, onion, garlic, lard, and bay leaves.
  5. Bring to a boil over medium-high heat. After 10 minutes, skim off any floaters—they’re not invited to this bean party.
  6. Reduce to a gentle simmer, partially cover, and let cook for about 2 hours. Stir occasionally so nobody sticks to the bottom.
  7. Check for tenderness. If they’re still firm, keep simmering another 30 minutes until they’re soft and cozy.
  8. Remove the aromatics (onion, garlic, and bay leaves) before serving or turning them into something fancier.

These beans are also the perfect base for Frijoles Charros, so if you’re feeling brave (or just hungry), go check out Bean There, Lost That: The Frijoles Charros recipe.

They’ll keep in the fridge for up to 5 days or freeze beautifully—future you will be so proud.

Posted in Bun Appétit

Bean There, Lost That: Frijoles Charro Recipe

Advertisements

Hey there! So, funny story: I could’ve sworn I posted this recipe before. I mean, I wrote it out, formatted it all cute, and probably even slipped in a pun about beans at the end. And yet, here we are—completely unable to find it!

I lovingly “borrowed” this frijoles charros recipe from my friend’s mom ages ago. I even wrote a whole blog about it, hit “publish,” and somehow… it’s just not there! It’s not on my website, not in my drafts, and not even in my “misc blog chaos FINAL FINAL FINAL” folder. 

Honestly, this isn’t too surprising for me. I tend to write everywhere: in my notes app, in journals, on napkins, on receipts, and in random Google Docs. If it can hold text, I’ve probably blogged on it! I once jotted down half a post on a paper towel. And let me tell you, I lost Hector’s wallet in my tote bag for two whole weeks! It was just hanging out under old receipts and about 47 non-working pens. So, losing an entire recipe kind of feels like my usual chaos! 

But here’s the good news—I actually remember how to make it! So, I’m writing it down right here, right now, before it disappears into the ADHD abyss forever. Let’s get cooking!

You’ll Need:

  • 5–6 cups cooked pinto beans (with liquid) – recipe below if you’re feeling extra
  • 1 tablespoon olive oil
  • ¼ onion, diced
  • 1 diced jalapeño (optional, but fun if you like chaos)
  • 5 slices bacon, diced
  • ¼–½ lb chorizo
  • 4 hot dogs, sliced
  • 4 pieces sliced ham (optional, but delicious)
  • 3–4 sprigs fresh cilantro
  • Salt and pepper to taste

Instructions:

  1. Heat a tablespoon of oil in a large pot or Dutch oven.
  2. Sauté the diced onion until soft and fragrant. If you want it spicy, toss in that jalapeño too.
  3. Add the diced bacon and cook on medium heat until it starts to crisp up.
  4. Add the chorizo, breaking it up with a spoon until fully cooked.
  5. Toss in the sliced hot dogs (and ham if using) and sauté another 2–3 minutes.
  6. If the bacon and chorizo have released too much oil, carefully spoon some out—just enough to keep things flavorful but not greasy.
  7. Add the cooked beans (with liquid!) and stir until everything’s cozy together. Simmer for about 5 minutes.
  8. Toss in the cilantro and simmer for another 2 minutes so it infuses that fresh flavor.
  9. Taste-test (the most important step), then add salt and pepper as needed.

Serve in a big bowl for dinner or as a side dish. Top with sour cream, salsa, or pickled jalapeños, and serve with warm tortillas

Posted in Bun Appétit

Pumpkin Spice Latte Syrup DIY: Bring Starbucks Flavors Home

Advertisements

Okay, okay, I get it—it’s still August, the kids are just going back to school, and summer is hanging on by a thread. But guess what? I’m already ready for fall. 🍂 And no, I’m not waiting until October to get my pumpkin spice fix. I’m an unbothered queen who’s already embracing the pumpkin vibes.

Last year, I said “peace out” to Starbucks (because, you know, self-love and saving money and we don’t support their political views), and while my local coffee shops are cool, their pumpkin spice lattes just don’t hit the same. So, here I am, making my own homemade pumpkin spice syrup. I’ve been making this for years, and I’m pretty sure I’ve shared this recipe before (like, two years ago when I was giving away the syrup with my pumpkin cookies as Christmas gifts),  I swear it was even on my fall bucket list but whatever—recycling is good for the planet, right? Plus, if you’re anything like me, you’re already planning for that first sip of pumpkin spice goodness, and trust me, this syrup will deliver.

Don’t worry; I’ll not only show you how to whip up the syrup, but I’ll also share how to use it. I’m so done with all those recipes that just show the syrup and leave you hanging. I get it—everyone has their own taste—but sometimes you really need a little more guidance.

Ingredients:

  • 1 ½ cups water
  • 1 ½ cups sugar
  • 4 (3-inch) cinnamon sticks
  • ½ teaspoon ground cloves
  • ½ teaspoon ground ginger
  • ½ teaspoon ground nutmeg
  • 2 tablespoons pumpkin puree (NOT the pie filling, we’re not making pie here)

Directions:

  1. Start with sugar and water: In a medium saucepan, combine the water and sugar. Bring it to a simmer over medium heat and stir until the sugar dissolves completely. (it should feel smooth, not gritty.)
  2. Add the pumpkin spice magic: Add in the cinnamon sticks, ground cloves, ground ginger, nutmeg, and pumpkin puree. Whisk it all together like you’re preparing for a fall holiday. Simmer for about 8 minutes, and let those spices fill the air.
  3. Cool down: Take the saucepan off the heat and let it cool to room temperature. Don’t freak out if it looks thin at first, because it will thicken as it cools.
  4. Strain and store: Strain the syrup through a fine-mesh sieve into a container. Store it in the fridge, and you’re ready to make your pumpkin spice dreams come true!

How to Make Your Pumpkin Spice Latte:

  1. Steam 6 ounces of milk until it’s nice and hot, then pour over 1 ounce of espresso (or regular coffee if you’re keeping it simple).
  2. Add 1-2 tablespoons of your homemade pumpkin spice syrup.
  3. Stir and serve!

I personally use about 2-3 tablespoons of syrup per 10-12 ounce cup of coffee, with just a splash of milk. But hey, it’s all about how you like it. Make it your own.

And that’s it! Whether it’s August or October, this homemade pumpkin spice syrup will have you feeling all the cozy fall vibes without the long Starbucks lines or the prices. I’m not here to judge if you’re already in the pumpkin mood—do you, boo.

So go ahead, enjoy your early fall indulgence, and let’s start sipping on those pumpkin spice lattes before everyone else even gets the memo.

Posted in Bun Appétit

My Mom’s Chilaquiles Rojos

Advertisements

I grew up eating chilaquiles all the time—like seriously, it was a regular thing for me! There’s nothing quite like those crispy tortillas drenched in spicy salsa with all your favorite toppings; pure comfort food feels like a warm hug with every bite.

Last month, when I visited my mom in Vegas, I only asked her to whip up chilaquiles. Not that I was being lazy (okay, maybe a little), but I really wanted to snag her recipe! Now that I’ve got it, I’m super excited to share it with you. Because honestly, what’s mine is yours—especially when it’s piled high with salsa and queso.

Let’s be honest: this isn’t a groundbreaking recipe moment! If you’ve been around for a bit, you probably know that many of these recipes come straight from my mom. Please think of this as a cozy little digital recipe book filled with her best-loved dishes. I’m just here to share the deliciousness and the beautiful memories that come with it!

Quick heads-up: whenever I borrow one of her recipes, the measurements are more like vibes. She’s one of those magical moms who seasons things by instinct until it “feels right.” So if something in the recipe seems a little imprecise, it probably is—and that’s okay. Trust your gut, taste as you go, and embrace the chaos.

🛒 What You’ll Need:

– 12 corn tortillas

– Canola or avocado oil (enough to coat the tortillas for baking or about 2 cups for frying)

For the Sauce (about 2 cups):

– 3 roma tomatoes

– ⅓ of a white or yellow onion

– 2 guajillo chiles (stemmed and seeded)

– 2–3 chiles de arbol (use more if you love the heat)

– 2 garlic cloves

– ½ tbsp Knorr chicken or veggie bouillon

– ½ tsp kosher salt

– 1 tsp dried oregano

– ½ tsp black pepper

– ¼ tsp whole cumin

For Toppings (let’s have some fun!):

– Mexican crema

– Queso fresco

– Avocado slices

– Chopped red or white onion

– Jalapeños

– Radishes

– Fresh cilantro

– Fried eggs

How to Make It:

1. Whip Up the Sauce:

– Start by boiling some water with the onion and garlic.

– Remove the stems and seeds from the chiles while that’s going on.

– Once the water is boiling, take it off the heat, toss in the chiles, and let everything sit for about 10 minutes to soften up.

– Blend it all together with cumin, salt, bouillon, and the rest of the spices until smooth—about 2 minutes.

– If you want, strain the sauce through a fine mesh sieve to get rid of any bits you don’t want. Leave a little texture if you’re into that!

2. Crisp Up the Tortillas:

– Cut your tortillas into triangles or whatever shape you like!

– In a large skillet over medium heat, warm enough oil to coat the bottom.

– Fry the tortilla pieces in batches until they turn golden and crispy—don’t overcrowd the pan!

– Once done, place them on a paper towel-lined plate to drain and sprinkle some salt on them while they’re hot.

– Keep the pan on medium heat, pour in the sauce, and let it simmer for about 2 minutes.

– Add the tortilla chips back in and gently stir until they’re coated.

– As soon as they soften up (but don’t get mushy), take the pan off the heat.

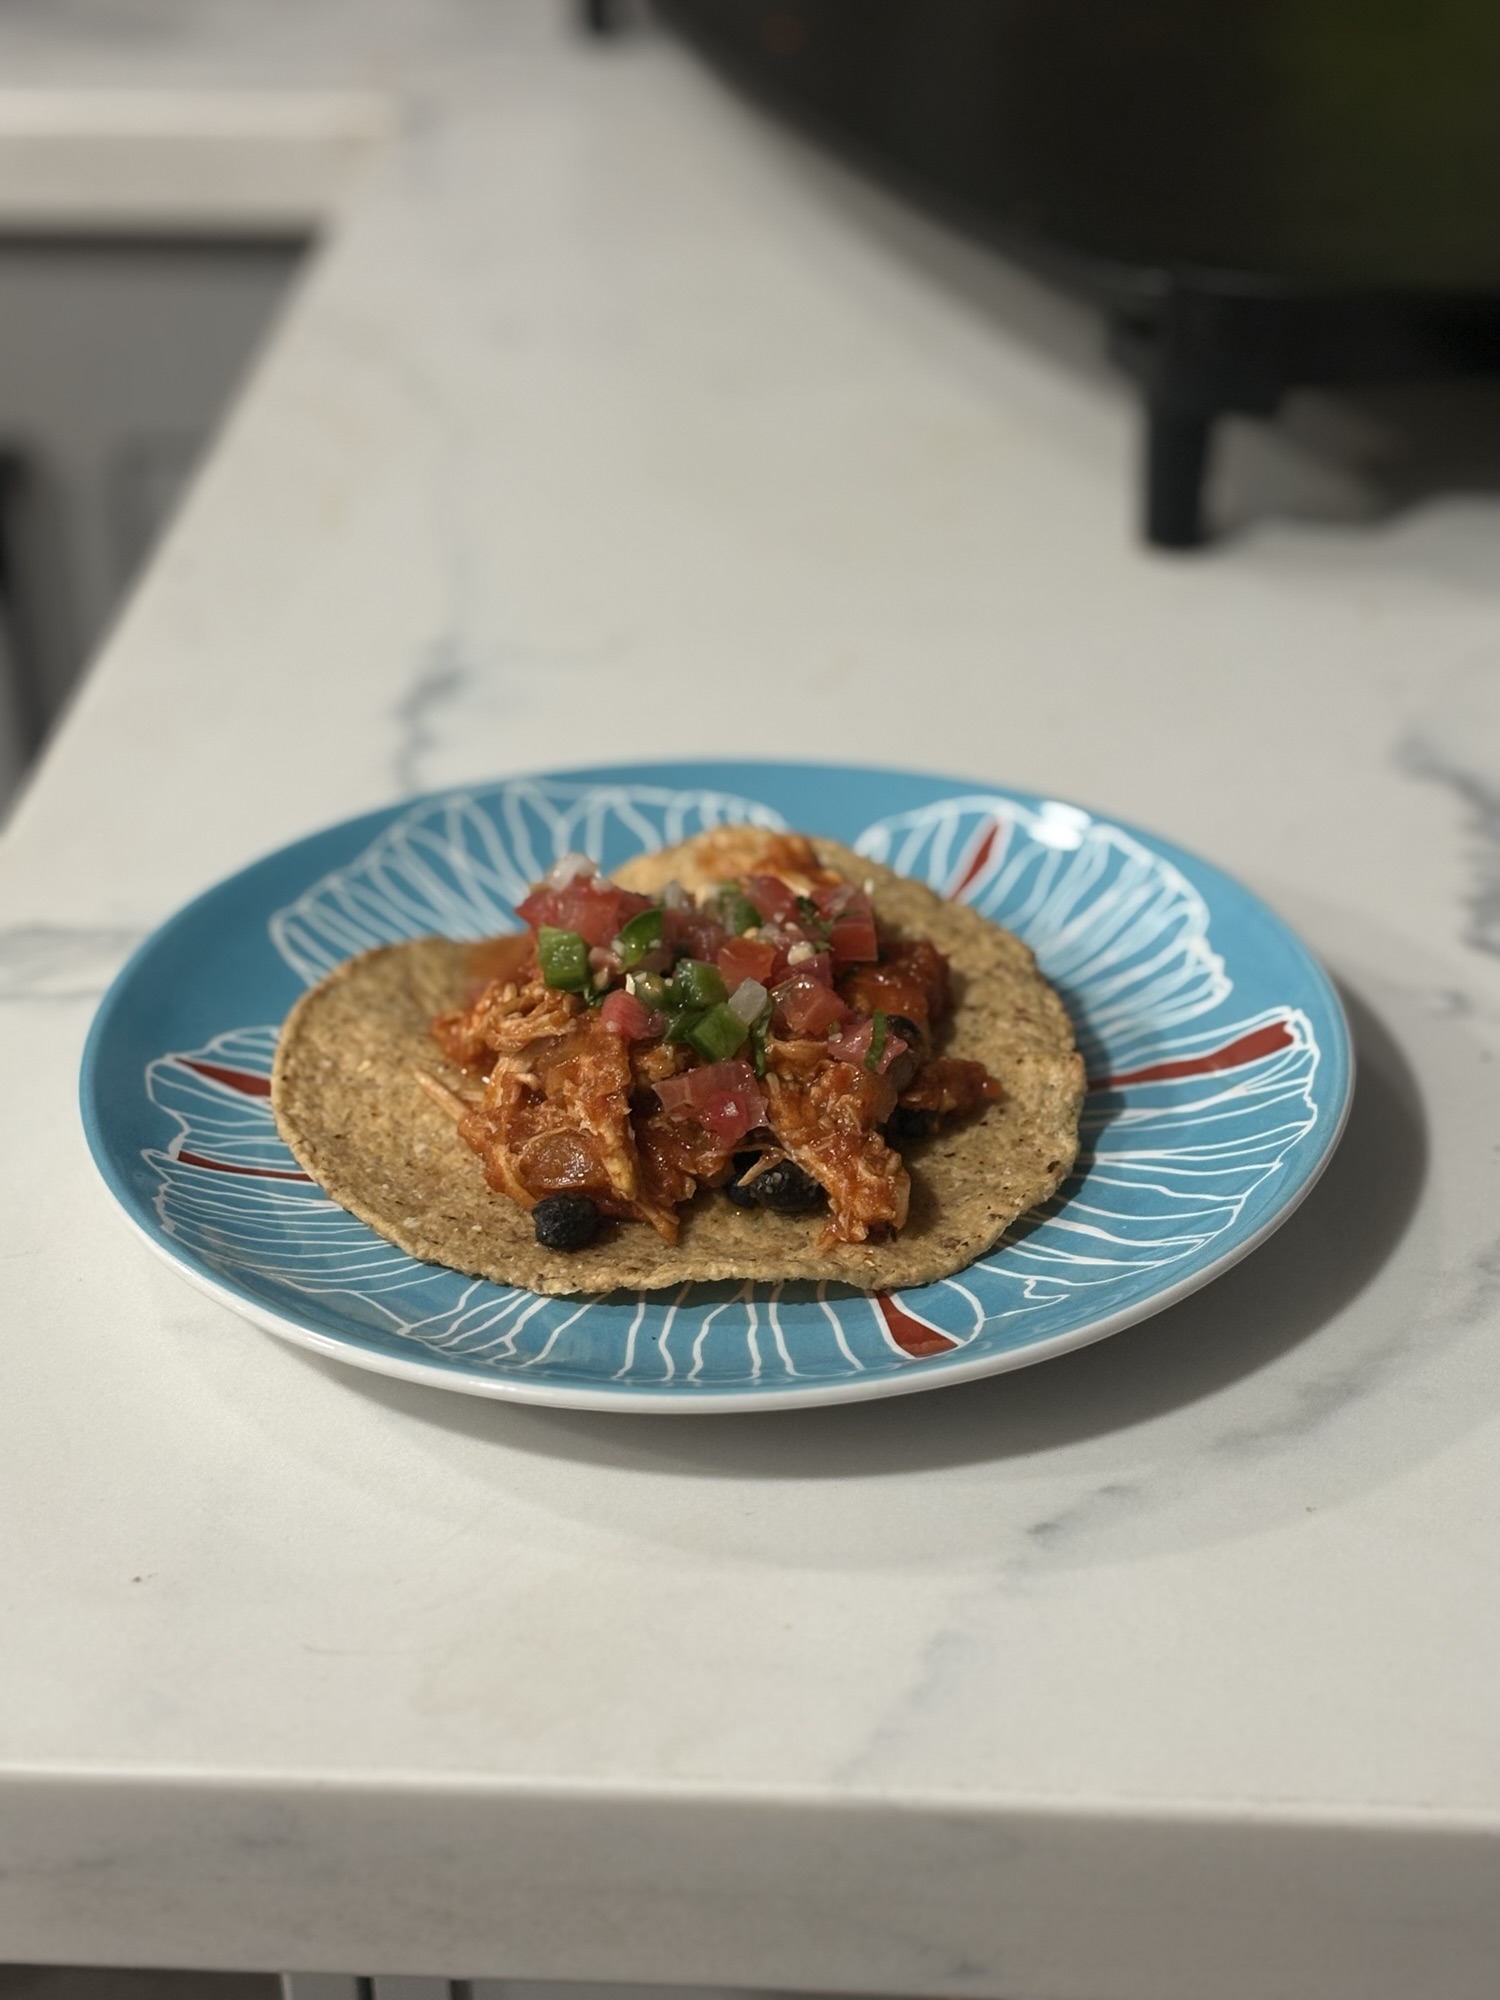
Serve It Up with Toppings:

Scoop those chilaquiles into a bowl or plate and load ’em up with your fave toppings! I love adding crema, crumbled queso fresco, avocado, and a fried egg on top—because why not go all out?

Oh—and the sauce? You can totally make it ahead of time if you’re trying to save time (or avoid a hangry meltdown). Honestly, when my mom’s feeling lazy, she sometimes just uses her enchilada sauce instead—which, by the way, is an absolute staple in her kitchen. So consider this recipe more of a snapshot than a rulebook. I’ve seen her make chilaquiles like this, but I’ve also seen her do it five other ways depending on the mood, the pantry, or the cheese situation.

This recipe is quick, nostalgic, and spicy—perfect for breakfast, brunch, or a late-night snack when you’re too tired to think but can’t ignore that hunger. My mom made it with tons of love, and now I’m passing that love on to you—messy measurements and all.